

Subject: Creating a pipeline to automatically send the build files to an FTP server whenever code is pushed/merged to the master.
Hello Readers,
I hope all of you are doing well. In this blog, I will create the pipeline for both react and node js applications.
Prerequisite: Admin access is required to create a pipeline for the repository.
The following are the steps to be followed :
Open the repository for which you wish to create the pipeline after signing into Bitbucket. The
menuoptions are located on the left side.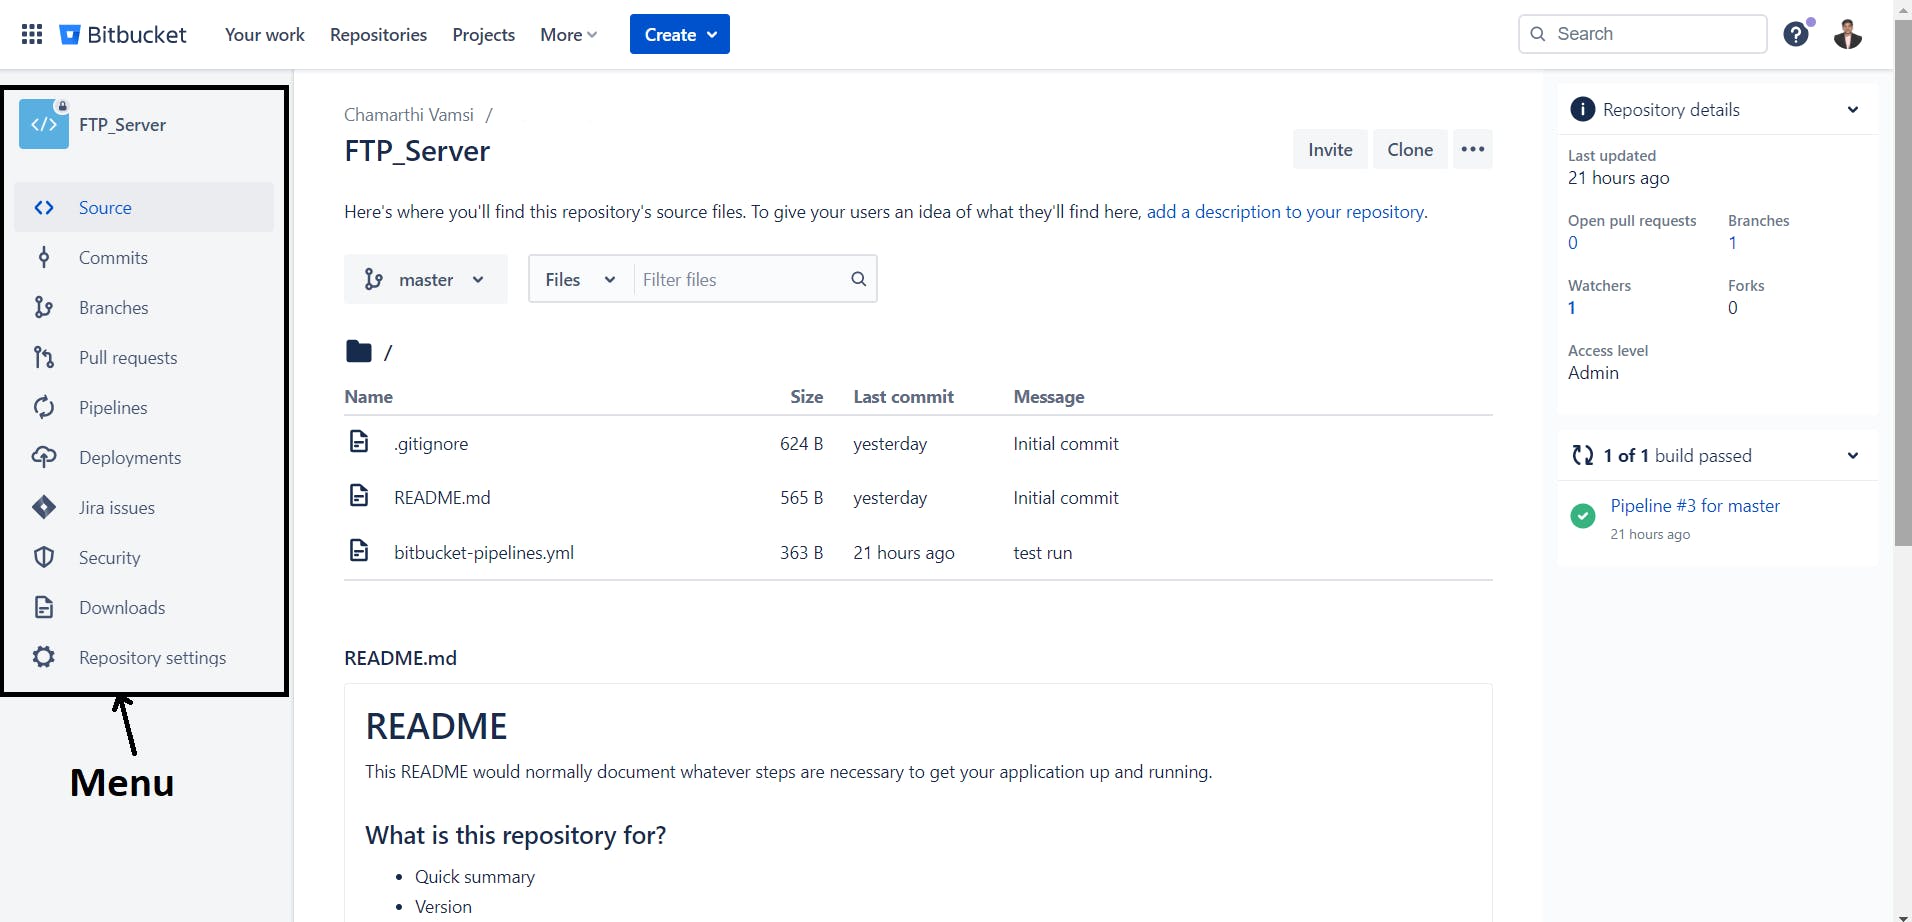
When you select the
pipelinesoption, a new page with different technologies for which we can create pipelines will appear.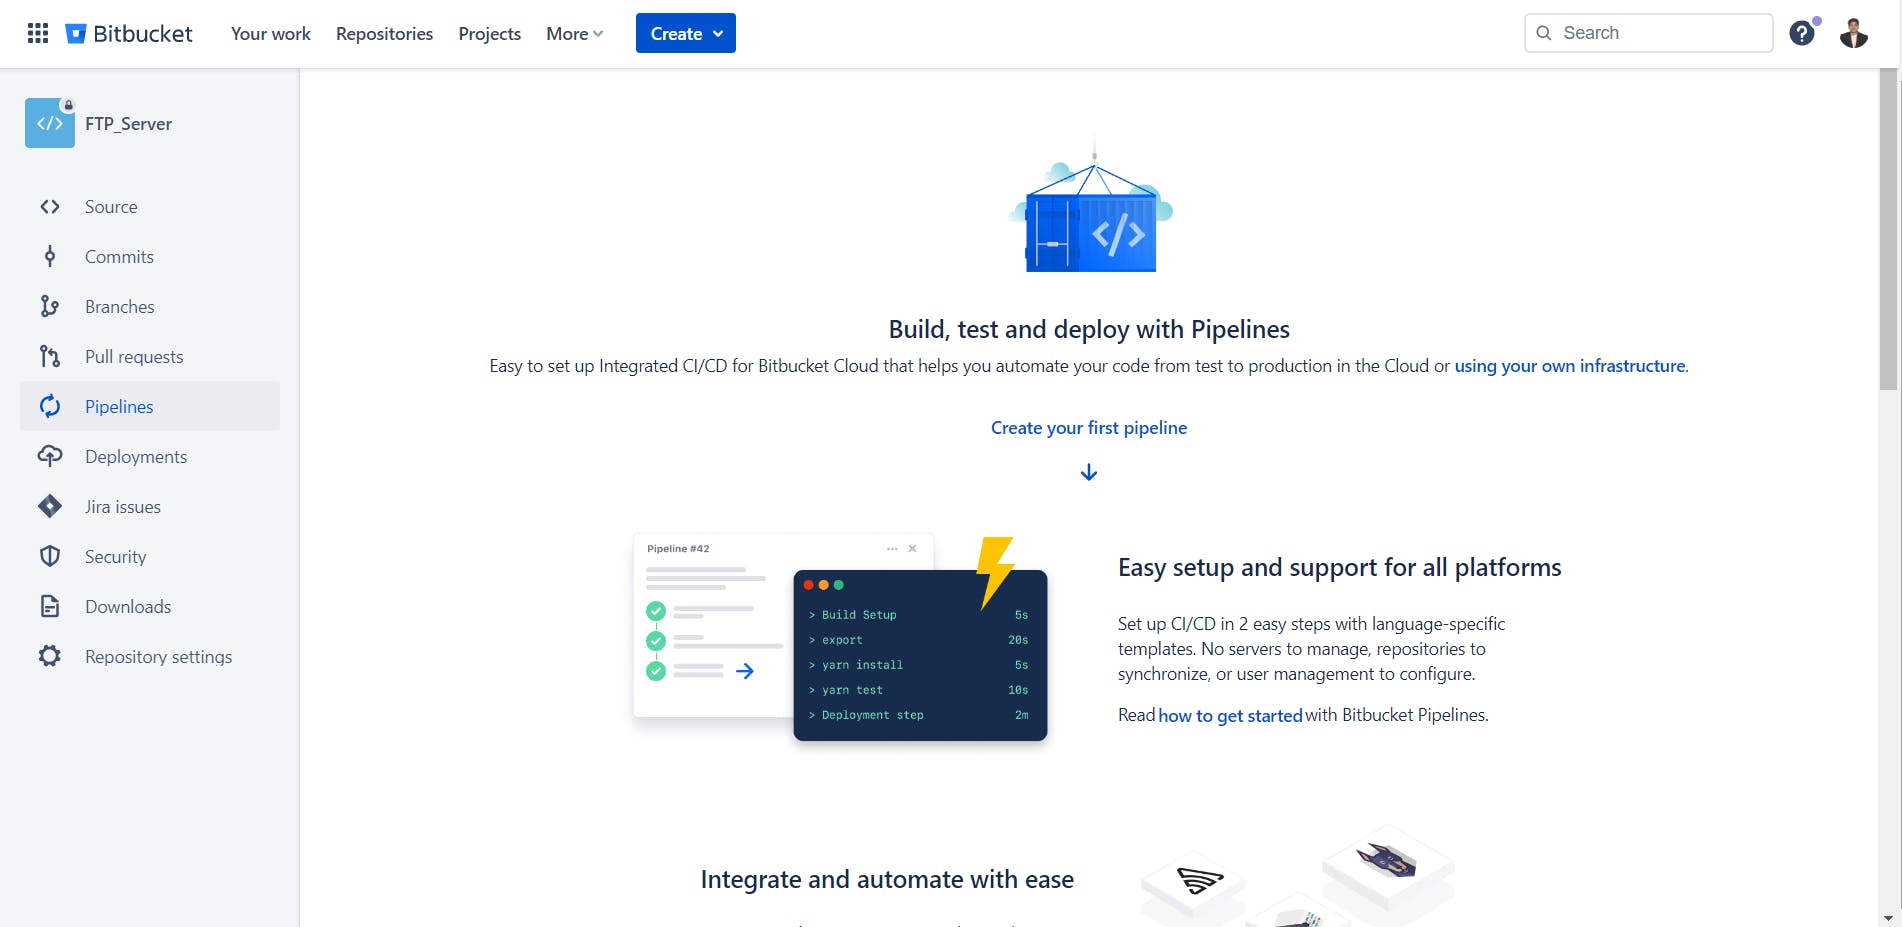
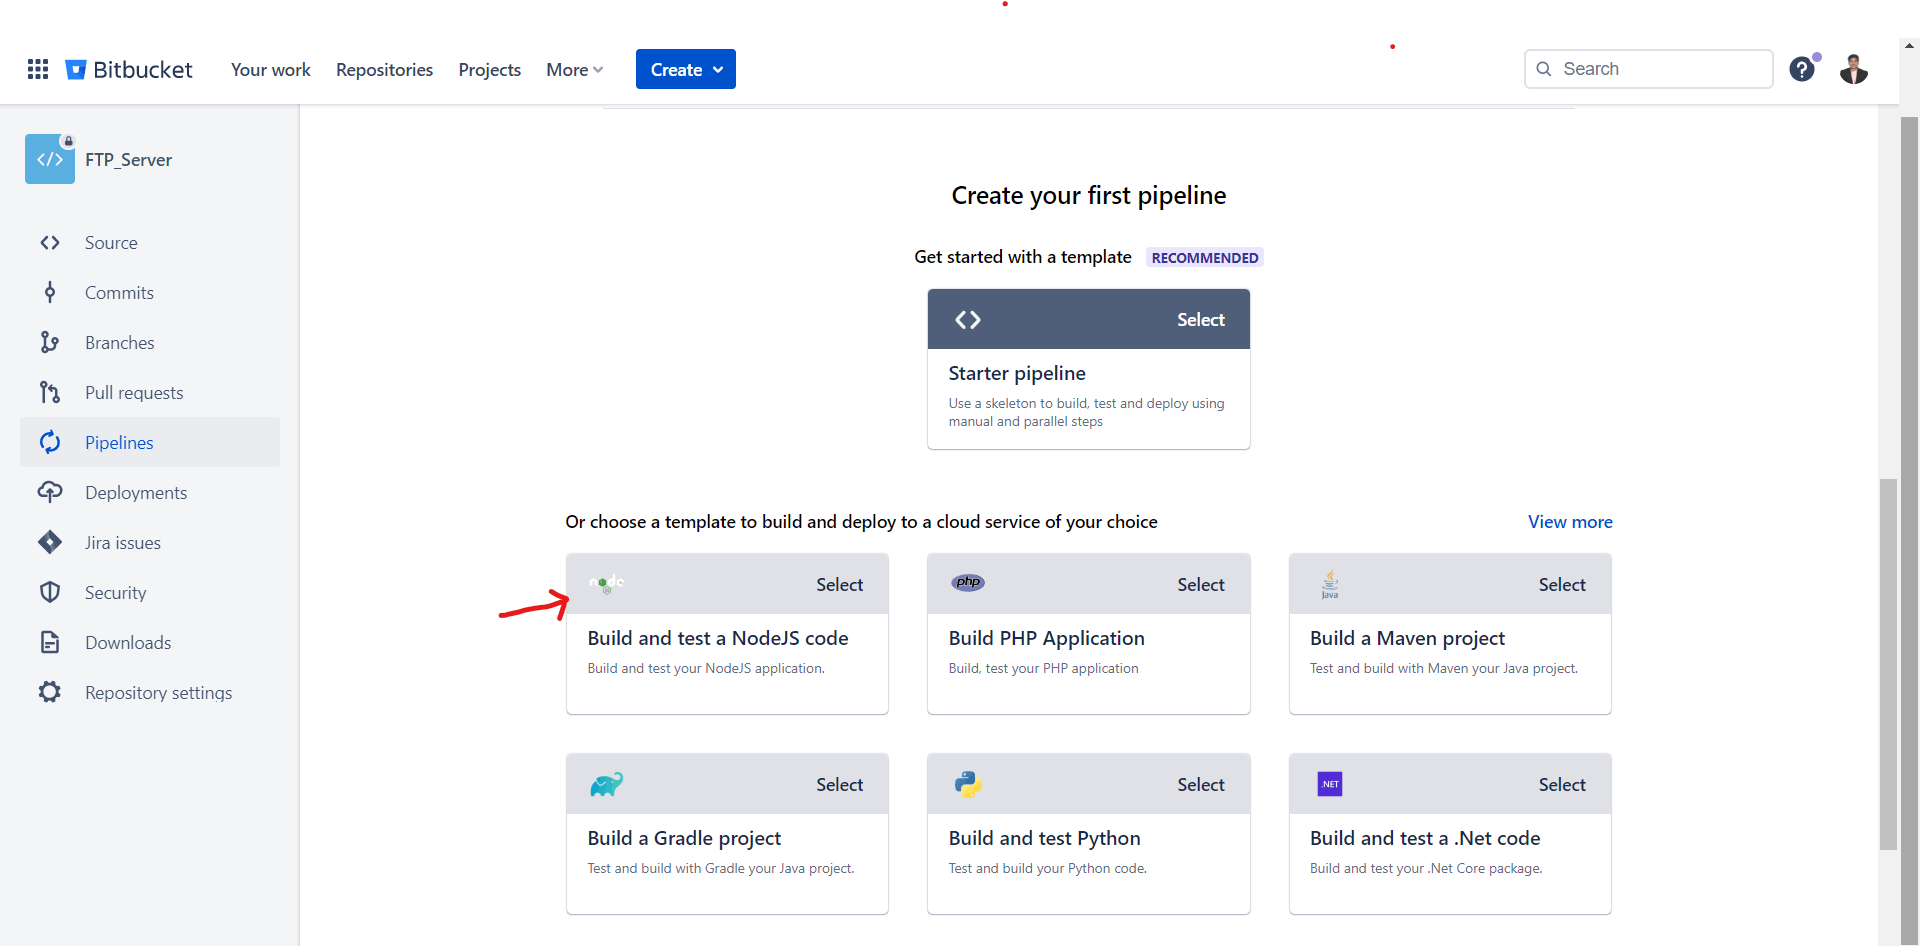
For any JS apps, such as React and NodeJS, choose
NodeJSexclusively. When you click on the language, a popup window containing several items, like boilerplate setups for YML files, Adding pipes, Steps, and Variables will be opened.We will now go through the yml configurations in more depth.
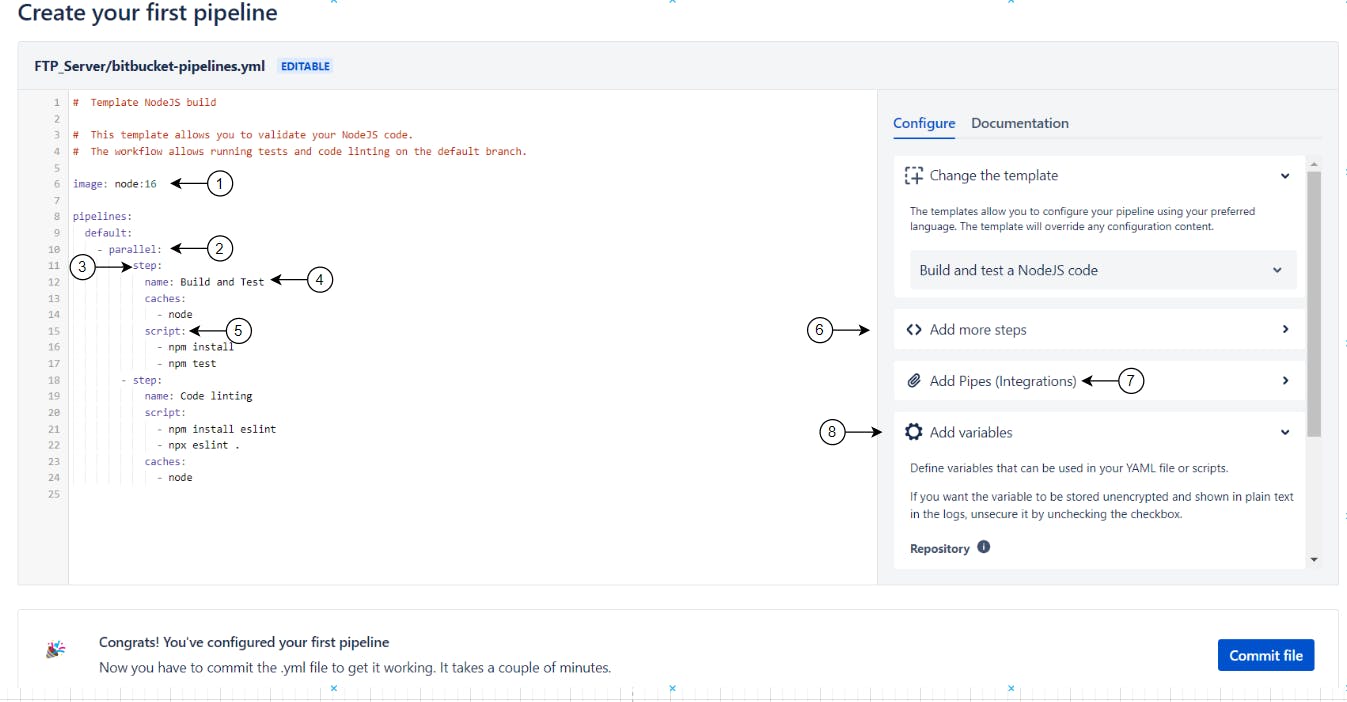
Image -> 1
In a Bitbucket Pipelines YAML file, the image field specifies the Docker image that will be used to run the build and deployment steps in the pipeline.
Docker images are pre-built, self-contained packages that include all the necessary software and dependencies to run an application. By specifying an image in the YAML file, you can ensure that your build environment is consistent and reproducible across different machines and environments.
The image field can be defined at the top level of the YAML file, or within individual step definitions. If an image is defined at the top level, it will be used as the default image for all steps in the pipeline. If an image is defined within a step, it will override the default image for that specific step. Here pipeline will use the node 16 (image: node: 16) version.
Parallel -> 2
the parallel keyword allows you to run multiple steps or commands in parallel, which can significantly reduce the overall build time of your pipeline.
Using parallel can significantly speed up your build pipeline, especially if you have a large number of tests or build steps that can be executed independently.
If you want to run the steps one after another remove the parallel keyword.
Step -> 3
a step is a single task or command that is executed as part of a pipeline.
A pipeline is made up of one or more steps, which are defined in the YAML file. Each step can run in its own Docker container, which allows for the isolation and reproducibility of the pipeline environment.
Name -> 4
The name will appear during the pipeline process. We should use a name that is understandable so that we can get to know which step is being executed.
Script -> 5
the script the keyword is used to define a series of commands or a script that will be executed as part of a pipeline step.
Each command in the script block is executed in a separate shell, which allows you to run multiple commands or scripts in a single step. You can use any shell commands or scripts that are supported by the Docker image specified in the image field.
Note that if a command fails, the pipeline will stop executing, and any subsequent steps will not be executed.
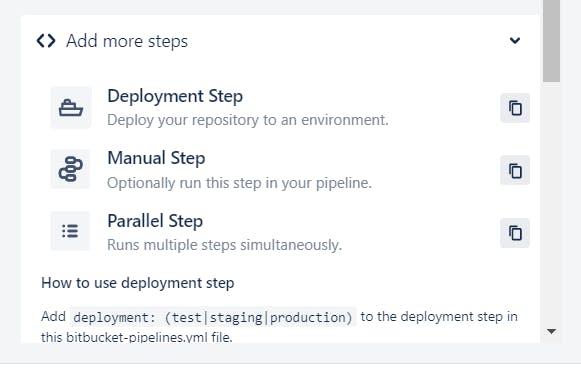
Add more steps -> 6
If you want to add any step you can click here and it will show you the available types. Select any type based on your requirement then it will show the code snippet copy and paste it into your configuration file.
Add Pipes (Integrations) -> 7
Pipes are like pre-built scripts that can be included in your pipeline YAML file. They encapsulate commonly-used functionality, such as deploying to AWS, uploading to cloud storage, or running a particular test.
Pipes are reusable, modular, and available to everyone, which means you can use the pipes written by others in the community, or even create and share your own pipes.
Click on the Add Pipes (Integrations) and enter FTP in the search bar and it will show you the available results.
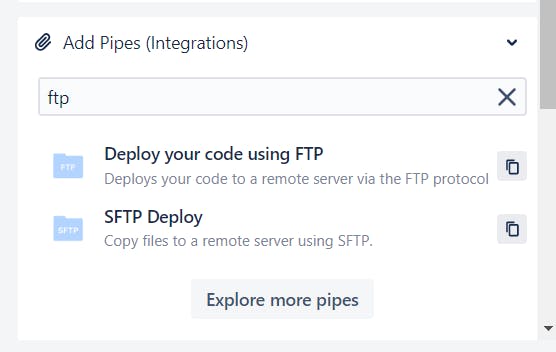
Now click on the first option i.e. Deploy your code using FTP and it will display a popup shown below.
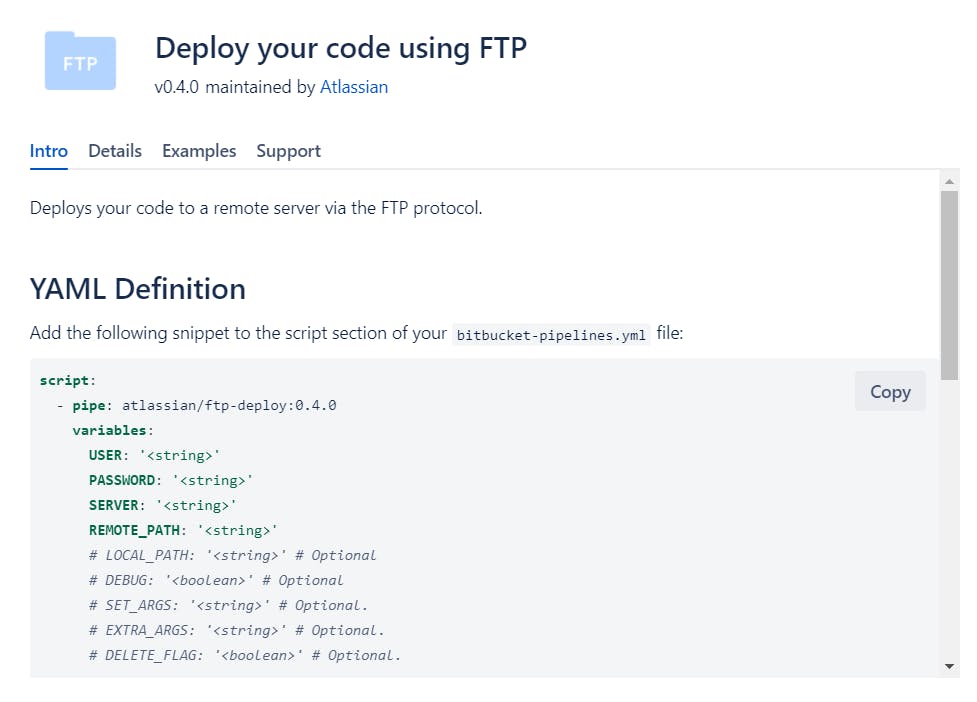
Copy the snippet and add it to your configuration file and you need to enter the credentials of your FTP server like USER, PASSWORD, SERVER, and REMOTE_PATH.
See the link below to learn more about the FTP pipe variables and their use case.
Bitbucket FTP Server Document Link
Add Variables -> 8
We shouldn't directly specify sensitive information in the yml configuration file, such as the user, password, or server. To achieve that we can create variables in the repository and add them to the configuration.
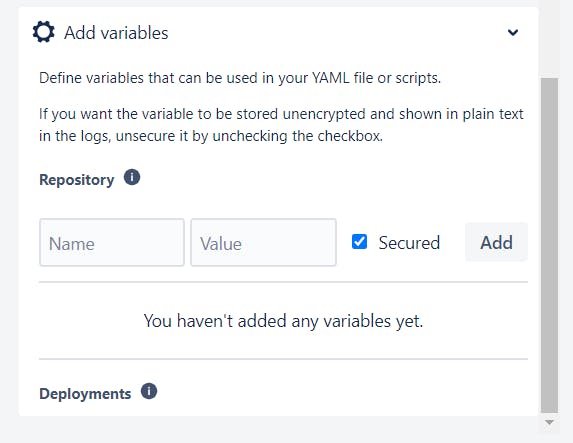
You can create a variable by adding a name and value. If you select the secure checkbox then the value will be masked so no one can able see it later. After clicking on the Add button you can able to use those variables in the yml configuration file.
Finally, the wait is over once everything is finished. Click on the
commit fileto start the pipeline. After that, yourbitbucket-pipelines.ymlfile will be created in the master branch. Henceforth, you won't need to worry about deployment because the pipeline will start automatically whenever the code is pushed or merged to the master.You can able to check the status in the
pipelinessection.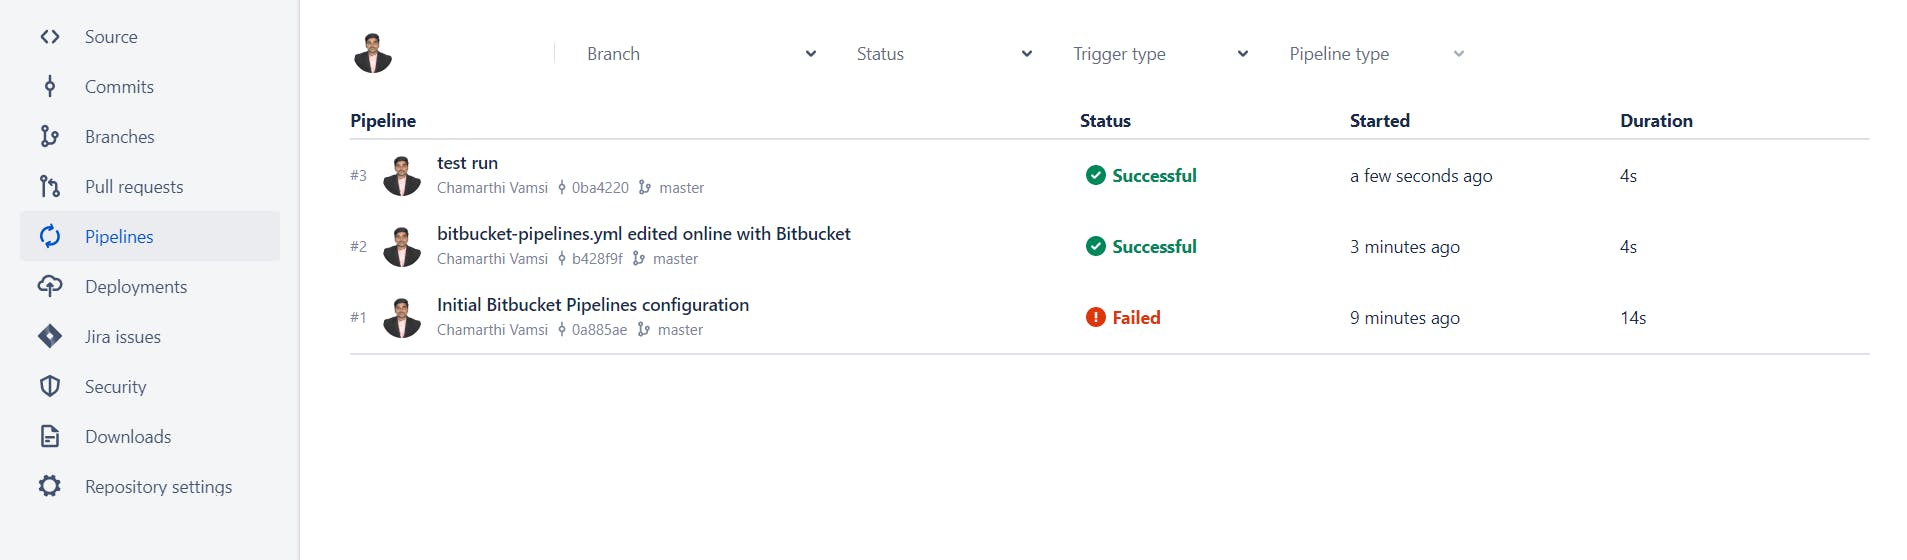
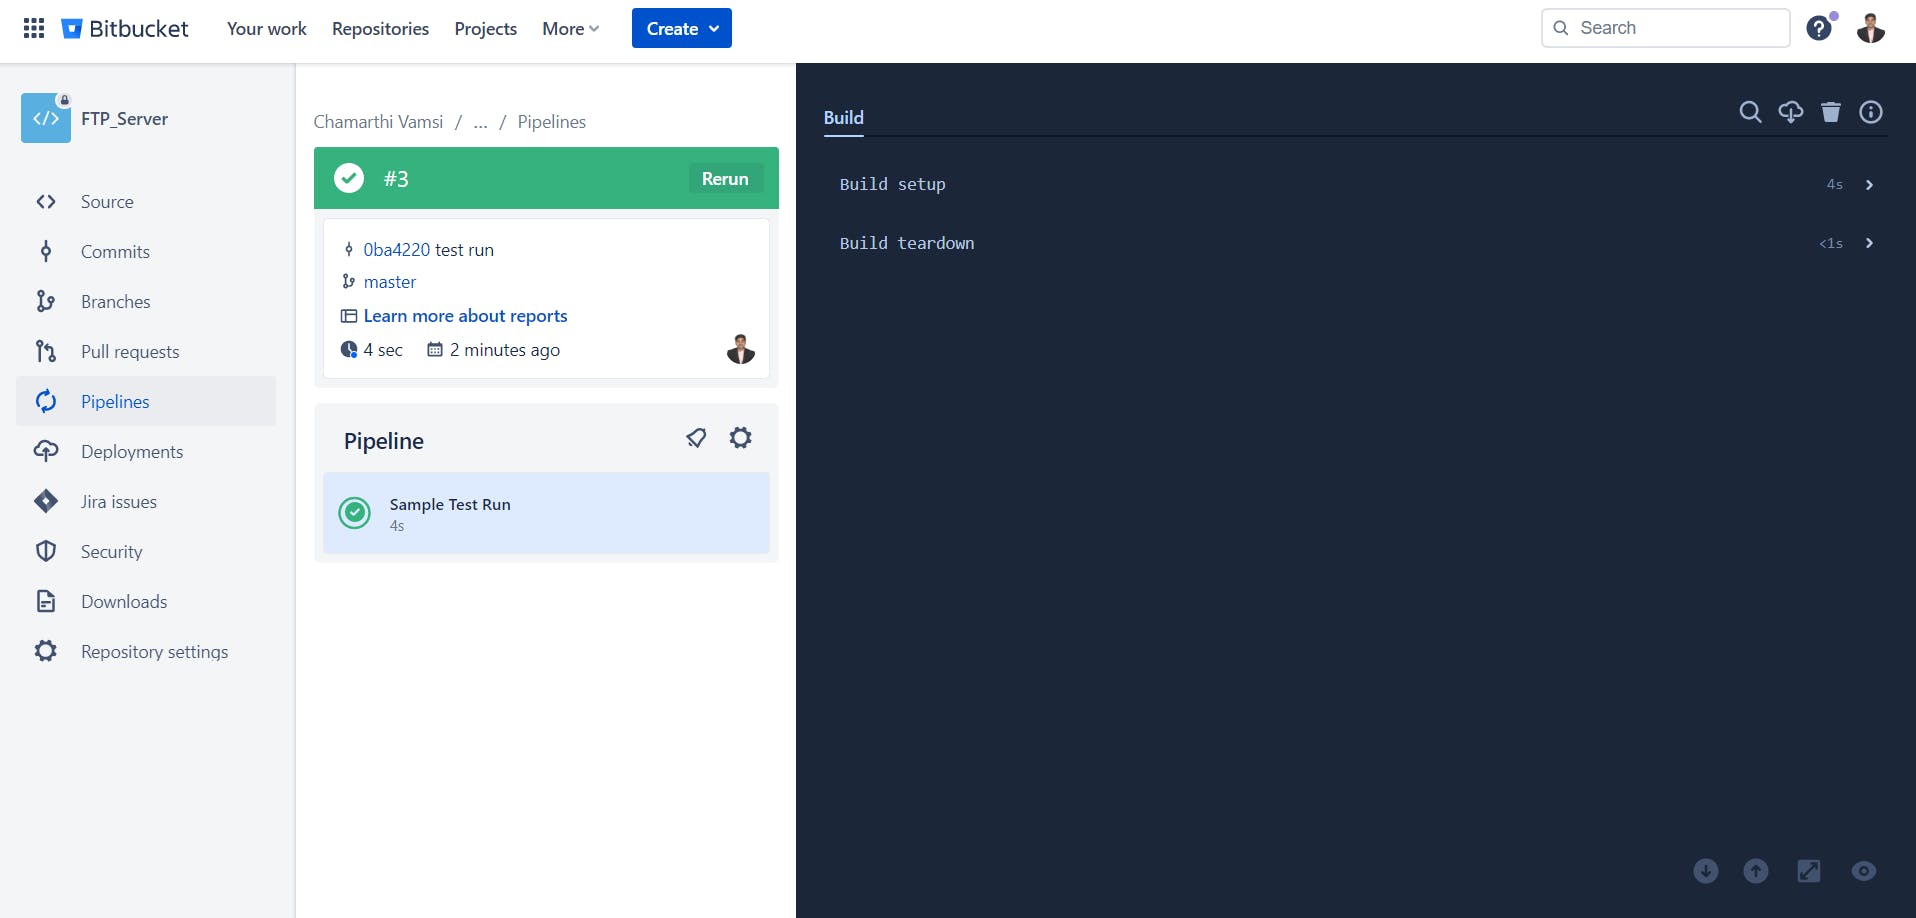
When you click on any pipeline it will give you more details about it.
The following are the code snippets that are helpful for you while creating the yml file configuration for node js applications.
Note : bitbucket-pipelines.yml file should be present at the root of the repository.
For React Application
image: atlassian/default-image:2

pipelines:
  default:
    - step:
        name: "NPM Install, Build and Zip"
        image: node:14
        caches:
          - node
        script:
          - rm -rf ~/.node-gyp/
          - rm -rf node_modules/.bin/
          - rm -rf build/
          - rm -rf node_modules
          - npm cache clean --force
          - npm install -g node-gyp
          - npm install -g node-pre-gyp
          - npm install
          - unset CI
          - npm run build-test
          - ls
          - echo "Building Zip File ..."
          - apt-get update && apt-get install -y zip
          - zip -r build.zip ./build
          - mkdir test
          - cp build.zip ./test
        artifacts:
          - test/**
    - step:
        name: FTP Push
        script:
          - echo "Pushing the code to FTP location ..."
          - pipe: atlassian/ftp-deploy:0.4.0
            variables:
              USER: $FTP_USERNAME
              PASSWORD: $FTP_PASSWORD
              SERVER: $FTP_SERVER
              REMOTE_PATH: $FTP_REMOTE_PATH
              LOCAL_PATH: '${BITBUCKET_CLONE_DIR}/test'
- Here we are setting
unset CIin the script so that it will ignore the warnings.
For NodeJS Application
image: atlassian/default-image:2

pipelines:
  default:
    - step:
        name: "NPM Install, Build and Zip"
        image: node:14
        caches:
          - node
        script:
          - rm -rf ~/.node-gyp/
          - rm -rf node_modules/.bin/
          - rm -rf build/
          - rm -rf node_modules
          - npm cache clean --force
          - npm install -g node-gyp
          - npm install -g node-pre-gyp
          - npm install
          - npm run build
          - ls
          - echo "Building Zip File ..."
          - apt-get update && apt-get install -y zip
          - zip -r application.zip ./dist package.json
          - mkdir test
          - cp application.zip ./test
        artifacts:
          - test/**
    - step:
        name: FTP Push
        script:
          - echo "Pushing the code to FTP location ..."
          - pipe: atlassian/ftp-deploy:0.4.0
            variables:
              USER: $FTP_USERNAME
              PASSWORD: $FTP_PASSWORD
              SERVER: $FTP_SERVER
              REMOTE_PATH: $FTP_REMOTE_PATH
              LOCAL_PATH: '${BITBUCKET_CLONE_DIR}/test'
I'm compressing the build files in the aforementioned snippets and uploading them to the FTP server location.
Artifacts ->
artifactis a file or set of files that are produced as part of a pipelinestep, and can be stored for later use or retrieval.
Conclusion
Now, on every push to
master, our pipeline will build and send the files to the FTP server location.I hope you enjoyed this blog. If you have any questions or suggestions, please leave a comment below.
Follow me on LinkedIn to know more about me -------> Chamarthi Vamsi.